Boss Rush unlocks after Hardcore mode for the relevant map. Once inside, the Final Boss appears at the ten-minute mark, so use the opening to assemble your weapon path and recruits. Ten minutes marks the Boss spawn, not a stated deadline for killing it.
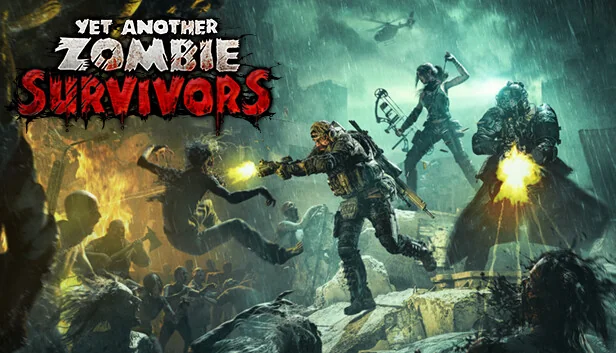
Awesome Games Studio official key art. Use the guide for the mode rules and team choices; the artwork is not a screenshot of a tested build.
Boss Rush at a Glance
The mode rules below come from the official 1.0 release notes. Strategy advice on this page is community-informed and is not a hands-on damage test.
Hardcore
Unlock gate per map
Complete Hardcore for the relevant map
10:00
Final Boss timing
The official notes say the Final Boss spawns at the tenth-minute mark
1
Boss target for the arena
The mode is built around the strongest foe of the area
2
Leaderboard dimensions
Arena and difficulty are tracked separately
How to Unlock Boss Rush
Boss Rush is a per-map gate, not one global unlock that automatically opens every arena.
1
Choose the map
Start with the arena whose Hardcore route you can prepare for. The official condition is checked separately for each map.
2
Clear Hardcore
Complete Hardcore mode for that map. If the mode remains locked, the current map list and latest client state take priority over an old guide.
3
Return to the mode list
Confirm that Boss Rush appears for the same arena. Do not assume a Hardcore clear on one map unlocks the Boss Rush entry on another.
4
Prepare for the clock
The area's Final Boss appears at 10:00. Choose the weapon branch and recruits you want before entering; reaching 10:00 starts the Boss encounter described in the mode rules.
Read the Three Mode Gates Correctly
Scroll the table sideways to read all columns.
Your goal
Required result
What does not substitute
Open Boss Rush on an arena
Complete Hardcore on that same arena.
A Hardcore clear on a different arena.
Open Infinite on an arena
Reach 30 minutes in Endurance on that arena.
Hardcore completion: the official 1.0 notes correct this older Infinite condition.
Enter Bio Lab, then work toward its Boss Rush
First complete Dead Terminal on Default to open Bio Lab; then complete Bio Lab Hardcore for its Boss Rush gate.
Opening the map alone does not satisfy its separate Boss Rush mode gate.
These steps combine the map and mode prerequisites in the official 1.0 release notes. They help separate a locked arena from a locked mode; they are not a walkthrough of the Hardcore fight.
Pick an Available Team Before Entering
Use the team-plan comparison to choose a Leader, two recruits, and accessible weapons. This mode guide does not identify any trio as a proven Boss Rush clear. For a missing weapon offer, check the permanent unlock and rank-4 replacement gates before spending more rerolls.
The mode-specific decision is whether your final weapon can keep damaging the Boss while you move. A team that handles ordinary waves has not yet demonstrated that it can finish the final target.
Separate a Locked Mode from a Reported Combat Bug
Scroll the table sideways to read all columns.
What you see
Relevant evidence
Next action
Boss Rush is still locked
The unlock is tied to Hardcore completion on the selected map.
Check which arena was cleared and which arena is selected. If the same-map requirement is met, record the platform, version and mode screen before reporting the discrepancy.
The Bio Lab Final Boss is stuck in a transition
1.0.1 lists a fix for the Bio Lab main boss becoming stuck at times.
Check whether that patch is installed on your platform. A motionless transition can match a reported bug; do not diagnose it solely as insufficient weapon damage.
Some weapons fail to damage Bio Lab enemies
1.0.1 lists a separate fix for Bio Lab enemies not receiving damage from some weapons.
Record the weapon name and enemy involved. Updating addresses a documented issue, but the patch note does not prove that every present-day no-damage symptom has the same cause.
Combat-bug entries come from the September 9 developer notes, which say other platforms will be updated as soon as possible. For an unresolved case, the developer’s troubleshooting thread is the support reference; this fan guide cannot inspect your save.
Strategy Limits and Version Notes
Useful direction, not a tested Boss DPS database
Officially confirmed: Hardcore unlocks Boss Rush for the relevant map; the Final Boss appears at the tenth-minute mark; faster kills improve leaderboard placement by arena and difficulty.
Community guidance: keep a carry weapon, a control layer, a range plan, and a separate Boss-facing damage path.
Not hands-on tested on this page: exact Boss HP, exact DPS, clear times, drop rates, fixed win rates, or a universal best team.
Version caution: 1.0 changed Boss base HP, critical handling for bursts and multi-projectiles, penetration behavior, and some Survivor values. Later patches may change them again.
Source conflict: pages that state a different Boss Rush unlock condition are not used when they conflict with the official 1.0 Changelog.
Current client wins: use the live mode list, Tooltip, skill tree, and latest patch notes when an older guide disagrees.
Continue With the Related Guides
Boss Rush preparation connects directly to Hardcore, builds, missions, and the 1.0 rules.
Related completion route:Camp Mission and Objective Guide — use the Mission Log when a Boss Rush or Hardcore prerequisite is connected to a mission.
Boss Rush FAQ
How do I unlock Boss Rush?
Complete Hardcore mode for the relevant map. The official 1.0 Changelog describes the gate per map, so a Hardcore clear on one arena should not be assumed to unlock Boss Rush everywhere.
When does the Boss appear?
The official release notes say the Final Boss spawns at the tenth-minute mark. That makes the first ten minutes a preparation race, not a normal long survival run.
What is the best Boss Rush team?
This page does not establish a best Boss Rush team. Use the team-plan comparison to check available weapons and recruits, then prepare a damage source that can stay useful against the moving final target.
Should I focus on crowd control or Boss damage?
Both are needed, but they do different jobs. Control creates safe attack windows; a separate direct or sustained damage path must convert those windows into Boss health loss.
Are the exact Boss HP and DPS values on this page tested?
No. This page deliberately avoids presenting exact Boss HP, DPS, clear-time, drop-rate, or universal win-rate values as hands-on-confirmed facts. Use the current client and latest official notes for numbers.
Why might an older guide give a different unlock condition?
Early Access and low-quality community pages can describe different mode gates. For version 1.0, the official Changelog is the stronger source: Boss Rush unlocks after Hardcore for each map.
Unofficial fan-made guide. Yet Another Zombie Survivors is a trademark of Awesome Games Studio. This site is not affiliated with or endorsed by Awesome Games Studio. Official Boss Rush facts were checked against the developer's 1.0 release notes on August 27, 2026. Strategy recommendations are community-informed; exact Boss values, clear times, and patch-sensitive results should be checked in the current client.